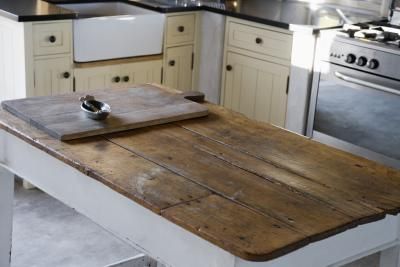
How To Seal A Wood Table Top In Three Simple And Effective Ways
Look around you, the best pieces of furniture are mostly designed out of a wooden material. Wood materials have constantly been in use for so many decades, which explains why almost everyone considers it as the best material for making cabinets and furniture. The problem with wood is it is vulnerable to insect and moisture attack which leads to wood getting damaged. Without protecting wood, it is going to warp and tear, and this is worse for table tops.
This is why people are encouraged to seal their wood table top, but there are several steps involved in sealing a wood table top. These steps or processes involved includes spraying using a particular varnish type, brushing, sanding, and staining. Taking a look at all of these processes we have mentioned, you are probably going to feel the process of sealing a table top is challenging and difficult. In real sense, the steps involved are not as challenging as you think.
As long as you follow the steps involved accordingly, you are not going to find the process of sealing a table top challenging. Following the right steps will make sure you obtain the right finish that you desire, but you need to be well informed of the steps and how to go about them if you want to obtain the right results. This is where this article comes in as it contains all the information you need on how to get sealing a table top done without stress.
So many finishes are known to feature a natural product or chemical product like acrylic resins that work effectively in sealing a wood table top. These products do not just work for sealing wood table top, they are also good at protecting the wood. In this article, you will read several ways you can successfully seal a table top, so stick around and find out every necessary information you should know.
Why Sealing A Wood Table Top Is Very Vital
There are so many advantages that comes with sealing a wood table top, and protecting woods which ensures they last for a very long time is one of the advantages attached to sealing a wood table top. Maintaining the value and beauty of your wood is another benefit that comes with sealing a wood table top, and this is the mystery behind some woods maintaining the beauty for lengthy years. Wood sealing is the reason for all of these.
Now that you are aware of the benefits that comes with sealing a wood table top, i am sure you are extra fueled to get it done on your wood table top. It is very crucial that you seal woods so they can last longer, and if you do not seal wood furniture, cabinets, or table top, they will lose their aesthetics, value, and will no longer beautify any spot they are kept. Come with us as the next section will show you how to seal a wood table top.
How To Seal A Wood Table Top

As we stated in the beginning of this interesting article, there are several ways you can adopt in sealing a wood table top. Therefore, here are some of the methods or steps involved in sealing a wood table top.
Steps On How To Seal A Wood Table Top
Sealing A Wood Table Top Using Lacquer
Lacquer is a glossy material which is obtain from a mixture of alcohol and tree resin, and it is one essential ingredient used for sealing wood table tops. Professionals and experts are of the opinion that it is the best agent anyone can make use of in sealing wood furniture, but using Lacquer requires you to work in a ventilated environment. Failure to do this will cause fumes to choke you.
How To Seal A Wood Table Top Using Lacquer
The first step you have to take is to prepare the surface, and it is important you clean up the surface if the surface already has a finish on it. You will make use of a 60-grit sandpaper to sand off the finish, but the edges of the wood would be checked properly if it table top is made of veneer or wood. The table top must be sanded lightly and smoothly. while holes should be filled up using a mixture of glue and sawdust.
The next step is to get a rag and clean up excess debris, dust, and foreign particles, and a vacuum cleaner can be used in obtaining the best results. Thoroughly cleaning the surface will get the surface prepared for the next step you want to take. This next step involves applying a thin coat, but you are required to wear protective piece of coat before applying the thin coat. You can wear chemical-resistant gloves and protective masks for safety and protection.
Applying lacquer should be applied using a spray gun, or a natural bristle brush can be used in place of a spray gun. A thin coat of lacquer should be applied to the table top, and you should start off with the edges till everywhere is evenly sprayed or painted. After applying the thin coat of lacquer, ensure you allow it to dry thoroughly. This might take a few hours, and you can proceed to sanding the surface once again.
The next step to take is for you to apply the second thin coat of lacquer, and you can consider applying as many coats as possible even though people believe two coats will be sufficient. Applying several coats will add more depth, and these coats cures into a perfect and robust finish.
Sealing A Wood Table Top Using Varnish
Varnishes are mostly high gloss topcoats that can be used for exterior and outdoor wooden projects, and they do all of these to provide protection. You will need a spar varnish, sandpaper, tack cloth, and natural bristle brush in applying a varnish, and below are the steps involved in using a varnish in sealing a wood table top.
How To Seal A Wood Table Top Using Varnish
The first step involved is a use a 120-grit sandpaper in sanding the surface you want to work on, and you can either clean the surface with a dry rag or vacuum it when you are done sanding the surface. If there are fillers available, you can use it in filling up any holes on the wood you want to work on, before proceeding to apply the first varnish coat using a natural bristle brush.
Before you apply the varnish, the first thing to do is to stir but not shake the container. Use a natural brush bristle to apply the thin coat evenly across the surface, and it will be best to start at the corner and edges. The next thing for you to do is to allow the surface to dry for about one or two hours, after which you can proceed to cleaning up all excesses. When it is well dried, you can sand the surface lightly so as to get rid of excess dust particles.
Mineral oil should be applied to the dry wood in order to sand the surface smoothly, and you can get rid of any excess dust or oil. After applying the oil, you can apply another coat of varnish to the surface. You can also apply the third coat so you can effectively get rid of excess dust on the wood surface.
Sealing A Wood Table Top With Polyurethane
One of the most durable and trusted finishes is polyurethane, and this is because it has the best sticking property. It has the ability to dry properly, and it forms a tough and durable finish once it gets dried. Polyurethane is found in the water based and oil based forms,and both forms have their benefits and downsides.
How To Seal A Wood Table Top Using Polyurethane
The first thing you should do is to prepare the surface and get rid of any dust on the surface of the wood. The dust can be removed using a vacuum machine or a tack cloth, and you should avoid shaking the polyurethane can or risk bubbles forming inside the polyurethane. If there are bubbles, it will cause the finish to look ugly. You can proceed to applying multiple thin coats instead of one, and it should be allowed to dry when you are done applying.
It is very vital that you sand in between coats, so a 180-grit sandpaper should be used in eliminating dust from the surface of the wood. When you are done sanding, go ahead and apply the second coat of polyurethane. It should be allowed to dry, and its waiting period could be anywhere from a few hours to a day.
Conclusion – How To Seal A Wood Table Top
Sealing a wood table top remains the right thing to do if you want your table top to last longer and maintain its beautiful look. Sealing a wood table top is better to wood table tops that are not sealed, and following all the steps we have mentioned in this article will make the step easy and offer the best sealing action.
Related Posts
How To Repair A Sticky Wood Finish