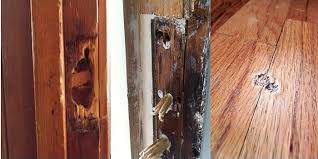
So many people are yet to understand the basics on how to fill cracks in wood before painting, and this is one page we encourage you to continue reading if you keen on finding answers. At some point, you will find cracks on wood as a disturbing and unattractive sight, but there are so many products that can be used in dealing with this damage and preventing it from extending.
Filling cracks on woods doesn’t just help the wood to regain its lost beauty, but you can trust filling up cracks in wood to ensure paint lasts longer when applied on affected wood. Having cracks on the surface of wood will only cause water retention inside of them which will end up causing more damage on the wood, and there are couple of items like wood filler and wood putty that can be used in dealing with this cracks.
These items will make sure that cracks are filled up so you can carry out any task you intend carrying out on the wood, when using wood fillers to fill up cracks in wood, they also help in repairing other defects that is present on the wood. This means they won’t fix cracks alone, but they will end up filling up holes and scrapes. Hiding every imperfection on the wood is the job of a wood filler, and it makes sure affected wood goes back to being attractive.
The purpose of this outline is to bring to you the methods you can adopt when filling up cracks on wood, and trust me when i say these steps will ensure filling up cracks are successfully carried out. If you want to get a well detailed information, we indulge you to continue reading this page which you will not only find interesting, but it will educate you on the right steps to take when it comes to filling up cracks.
There are certain tips and prevention you need to carefully consider when filling up cracks in wood before painting, and below are some key professional tips you should not wave aside.
Tips And Prevention On Filling Up Cracks
- A face mask must be worn when working with any material, and the purpose for this is to ensure safety at all times
- Making use of vinegar to get rid of epoxy from the skin
- A respirator must be worn to prevent taking in wood particles when working, and this is important in making sure you do not breathe in harmful chemicals
- Cleaning of wood surface can be done using denatured alcohol
- It is not completely possible to prevent air bubbles, but these bubbles can be carefully removed to prevent further damage. Using air guns will make it easy for bubbles to leave
Below is a list of materials you should have available when trying to fill cracks on wood before painting;
- wood filler
- wood putty
- sandpaper
- putty knife
- mixing cup
- dye or pigment
- respirator mask
- colored marker
- stirring materials
- glue
- sawdust
How to Fill Cracks in Wood Before Painting
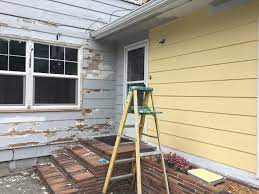
Below are steps you can take when filling up cracks on wood before painting;
Using Wood Putty Or Wood Filler
It is very crucial that you wood filler you make use of has the same color as the wood you want to work on, and preferably, you can make use of a crayon shaped wood putty or wood filler. The truth is so many wood fillers comes in various shapes and colors, so finding the one that best matches your wood is of significant importance. You can use your fingers in filling up cracks on wood with the wood filler, and ensure you spread the filler in crack using your fingers.
On the other hand, you can opt to use a putty knife in filling up cracks on wood, and sanding later and cracking flat and regular surface will ensures everything blends perfectly. Flattening the material properly is necessary before the wood gets dried, but there is completely nothing to worry about if there is no putty knife available. However, this should be carefully done to make sure that debris doesn’t interfere with what you are doing.
Furthermore, you should give the wood filler up to eight hours to get dried, while a light of fine grit sandpaper should be used to make the surface smooth. This step will also help in getting rid of excess wood putty that is left on the surface of the wood.
Using Epoxy In Filling Up Cracks
Making use of epoxy material requires to make use of a respirator mask and work in a conducive environment, and this means staying safe is of great importance when working with epoxy in filling up cracks. It is wrong to inhale epoxy as it could end up damaging your health, so you should do what is necessary to prevent yourself from having respiratory issues. Make sure your workplace is free from friends or family when working with epoxy.
It is also very necessary that you find the right epoxy that will blend with your wood, and the trick behind getting the best result lies in finding the right epoxy for you. You should avoid going for an epoxy too cheap or very expensive as there are affordable epoxy materials that will deliver outstanding results when used. Go for an epoxy that has more open time if the crack you want to fill up is a very large one, so you should consider an epoxy with 60 minutes open time.
A critical step to take is tinting the epoxy as it will help the epoxy to match with the color of the wood. This is useful in creating a very beautiful pattern on wood, and tinting of epoxy can be done using any color of your choice. When tinting is done, proceed to filling up cracks with the epoxy, and this can be done by pouring epoxy right inside the crack and doing everything possible to push them in.
It should be allowed to dry and and flattening with a sandpaper is necessary to obtain a leveled surface. The final step you have to take is to color using a felt tip marker, and this is essential if you want your work to be cleaner. The purpose of the felt tip marker is to make sure that the trace of cracks are no longer there, and the felt tip marker should have the same color with the epoxy that has been used to fill up the cracks on the wood.
Using Glue And Sawdust To Fill Up Cracks
The final step is using sawdust and glue to fill up cracks, and the color of sawdust you want to use must match the color of the wood that is being worked on. When using glue, ensure it is gradually added to the cracks until everywhere is reached, and you can apply glue using a scraper tool. You must make sure the glue goes in very deep if you are dealing with a large sized crack, and excess glue can be removed using the same scraper to make sure wood surface is leveled. The next step is allowing glue to get cured, and you can sandpaper when it eventually gets cured.
The purpose of sanding the wood surface is to make sure the surface is smooth, and everywhere gets seen easily. In order to achieve a well leveled and smooth surface, ensure that you make use of a 120 to 220 grit sandpaper. This will make sure the surface of the wood gets rub carefully, and the smooth surface you desire gets achieved. If you are using sawdust, it can be gotten after sawing the wood to get a sawdust that matches with the color of the wood.
Conclusion – How to Fill Cracks in Wood Before Painting
After explaining every step involved in filling up cracks in wood before painting, we will like to think that you will no longer find this task to be challenging or daunting. This means you can get this task done in due time, and you can choose any of the methods we have discussed up there to get it done for you. Believe me when i say every method we have talked about has a ninety five percent success rate, and you are guaranteed being left with exceptional results.
The truth is there are methods that have greater chances compared to other methods, and one method with a higher level of effectiveness is the use of epoxy. However, every method we have discussed has its own benefits, advantages, drawbacks, and downsides, but they will end up getting you the result you desire. Being able to carry out all of these methods like we have explained is key to obtaining desired results, so make sure you pay attention to every detail.
Good luck with any of the method you decide to work with, and feel free to tell us what method worked for you in our comment section.